Project Summary
If you have a dog, cat, or lion cub, this is the project for you. This Pallet Pet Bed is a simple and stylish project that is sure to keep your pet happy. The great thing is that this can be done on a lazy Saturday afternoon, and what a way to spend your day off!
Level of Difficulty
Materials Required
- Pallet Wood
- 1- 2x2" Piece of Lumber
- 4 - Small Inside Angle 90 Degree Braces
- Grey Stain
- Sandpaper
- 1/8" Drill Bit
- 1 5/8" and 2" Wood Screws
- 4 - Locking Caster Wheels
Time to Complete
Tools Required
- Drill
- Orbital Sander
- Circular Saw
- Tape Measure
- Clamps
- Straight Edge
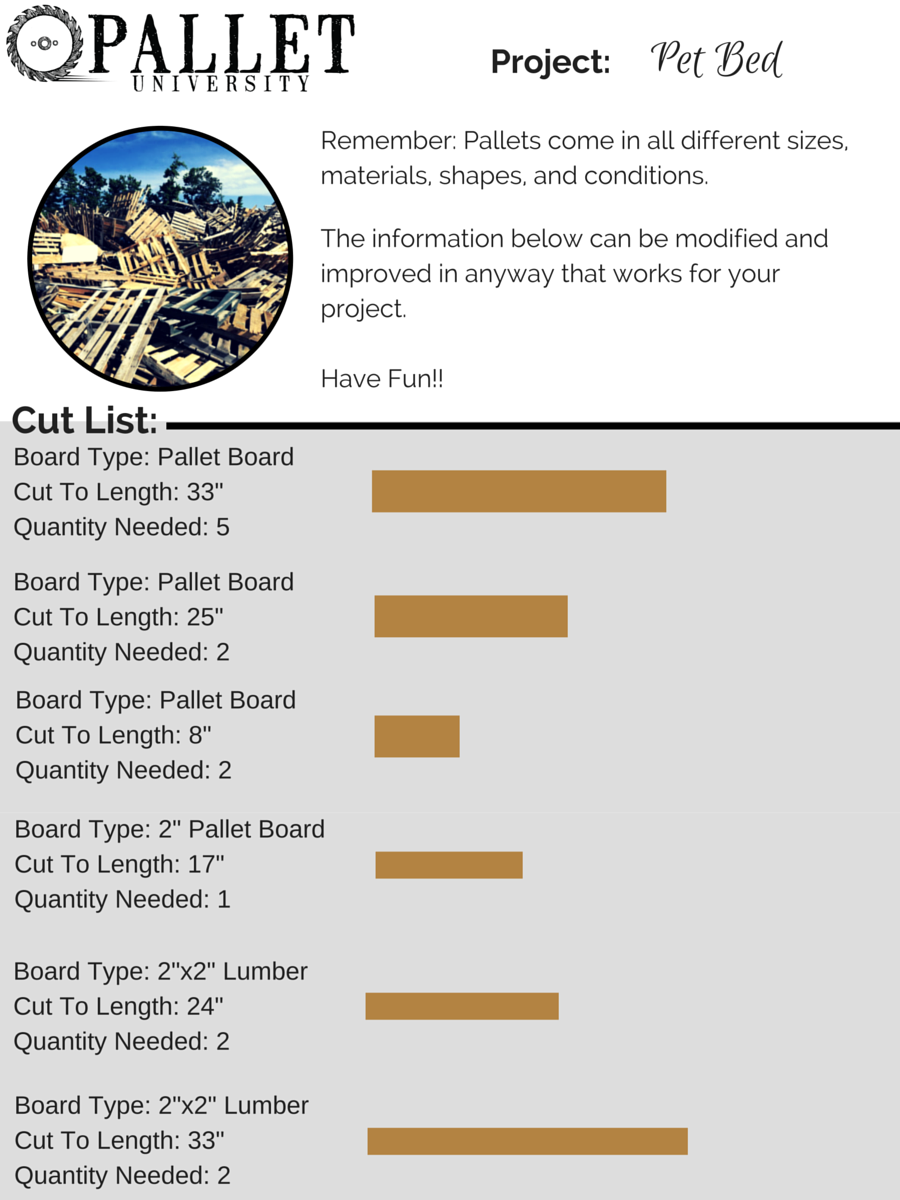
VIEW FULL CUT LIST
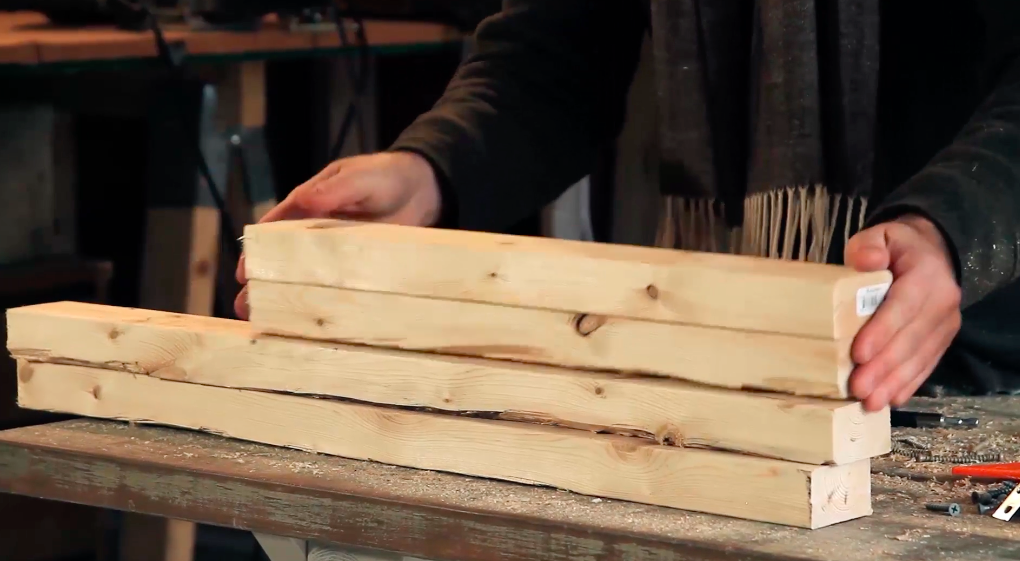
1. Cut Your 2x2 to Size
We start our pet bed by cutting a 2x2 board into 4 pieces. This will become the outer frame of our bed. The dimensions of this frame are 33in x 24in - so that means 2 of your boards should be 24 inches long and the other 2 should be 33 inches long.
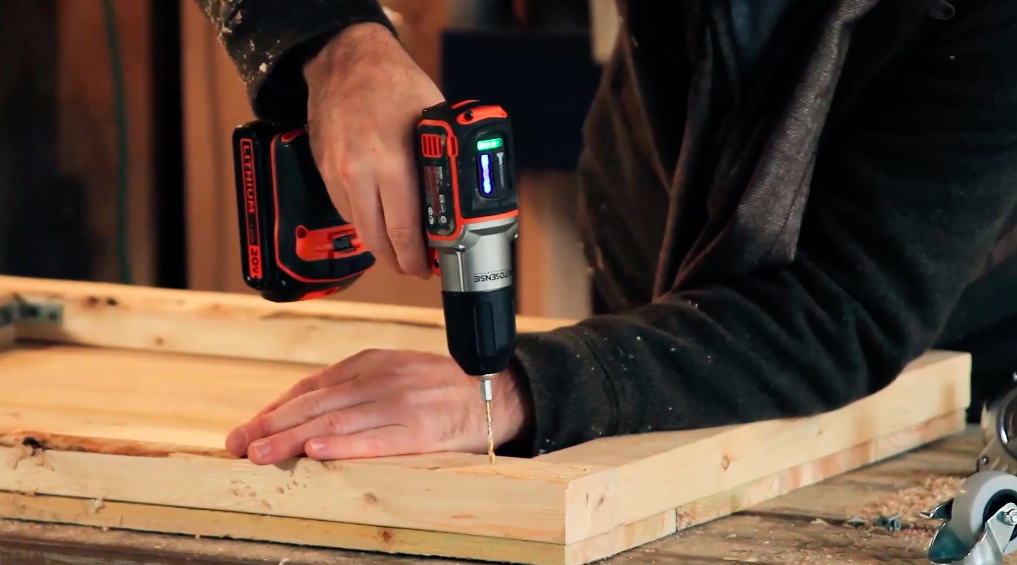
2. Connect Your Frame Pieces
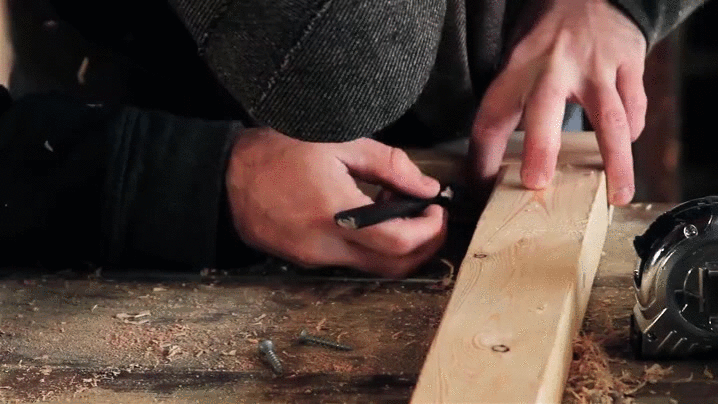
Using small, L-shaped braces, connect all 4 pieces to create your 33 x 24 pet bed frame. If needed, you can use a pencil to mark your spot first, to make sure that you get your brace centered on the board. Ideally, you'll use a total of 4 screws on each corner (2 on each side of the "L" shape.)
To make life easier, always pre-drill your holes by putting the brace in place and using a small drill bit first before driving in the screw.
Once you've got all 4 pieces in place and braced up, you should be left with a fairly flat, rectangular shape as shown below. All wood bows a little one way or the other, so if it isn't perfect or has a little wobble it's okay. The weight we add to it with the pallet boards will help flatten it out even more.
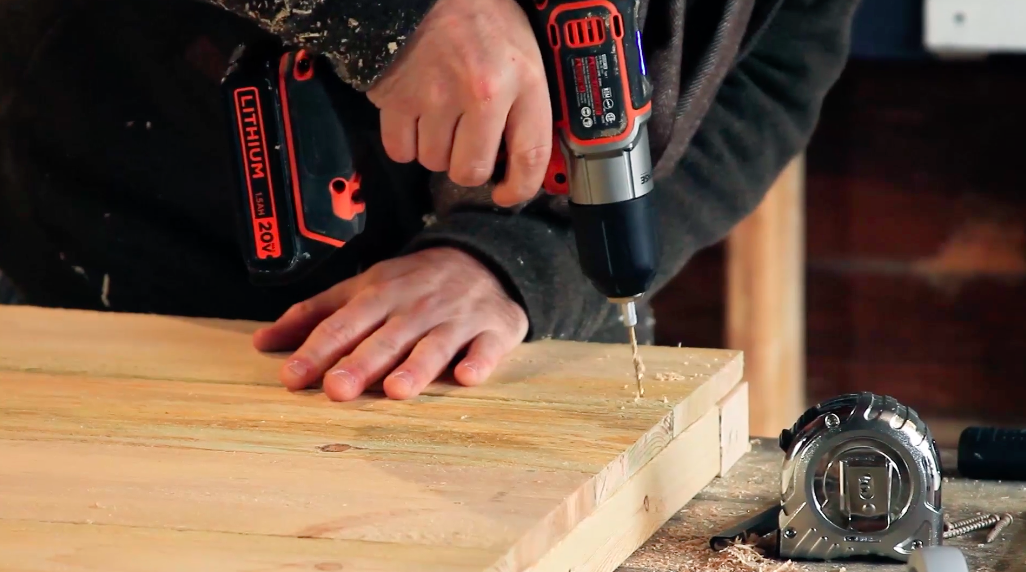
3. Screw Pallet Boards into Frame
Once again, you should pre-drill your holes here. Very simply, you need to find a combination of pallet boards that you like that will cover the full width of the pet bed.
In the video, I found mostly wide pallet boards that covered the area, but feel free to mix in some more narrow boards or even cut boards to fit as needed.
Once you've laid out several pallet boards that cover the full width, proceed with pre-drilling your holes and then screwing the boards into the frame using a screw no longer than 2 inches.
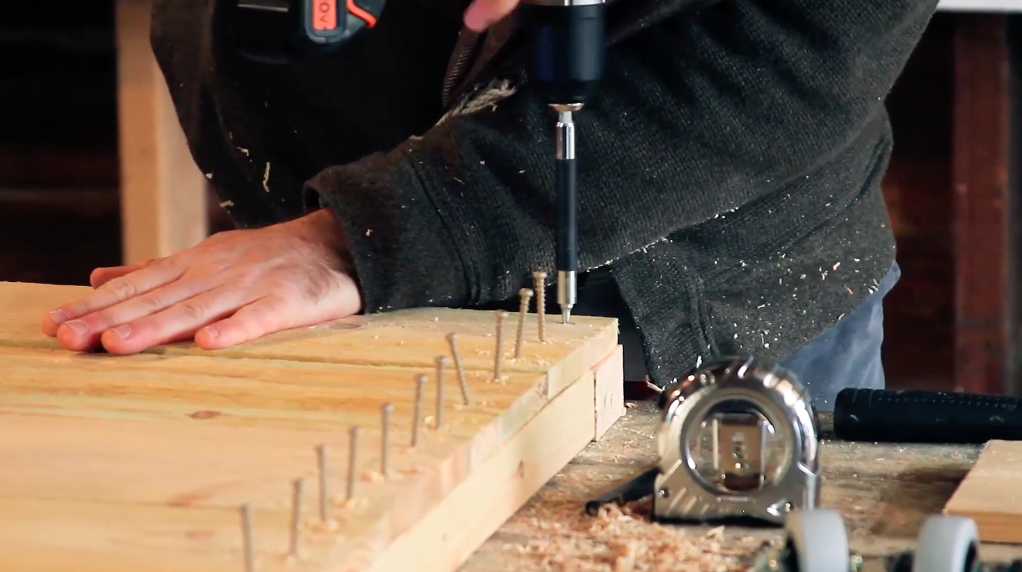
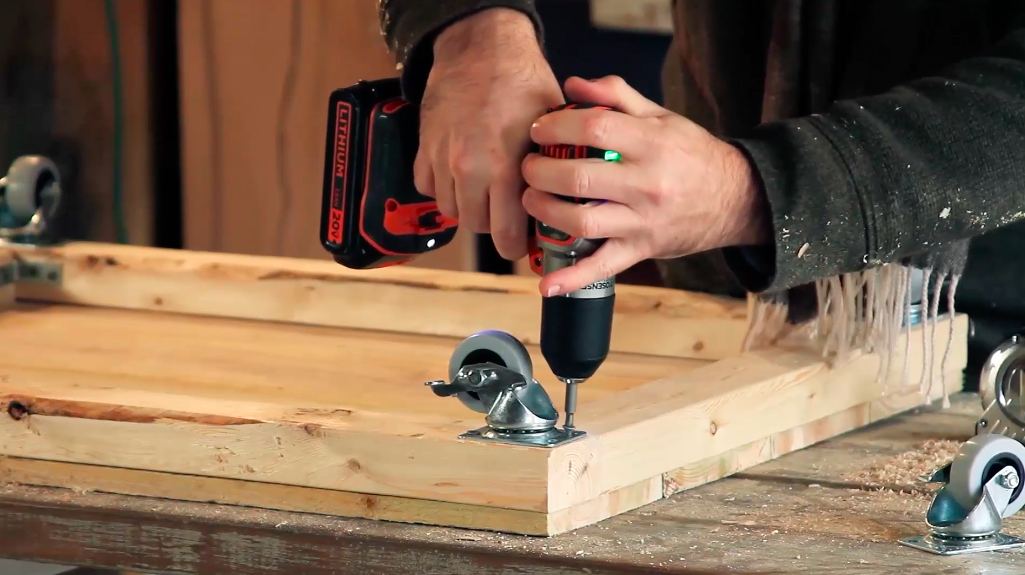
4. Attach All 4 Wheels
One of the coolest features of this pet bed is the caster wheels that will let you move it around as needed. Remember, make sure you buy the kind of wheel that can easily lock and unlock so you can hold the bed in place when you want to.
After you've attached all your pallet boards to the top of the frame, flip it over so you can start adding the wheels on the bottom side of your 2x2 frame pieces.
To start, put your wheels in all 4 corners one at a time and use a pencil to mark the holes.
Then, as always, pre-drill your holes before screwing your wheels into place. Since you've marked all your holes with a pencil, it might be easier to put your wheel to the side and pre-drill your holes. Once you've done that, attach the wheels using a screw that is about 1.5 inches long.
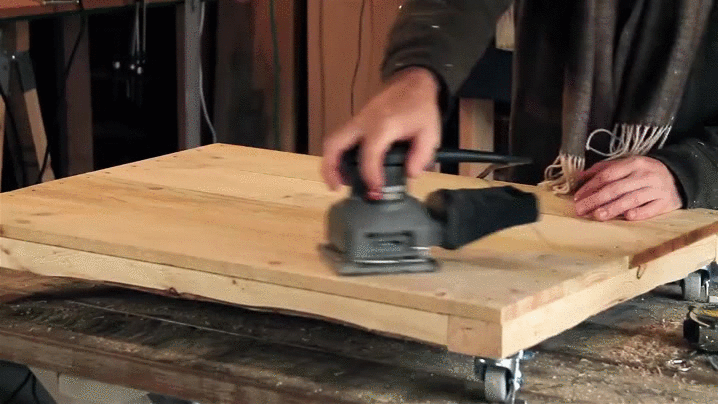
5. Sand Top of Bed
Next you'll want to lock the caster wheels into place so you can do a good sanding on the top of your bed. So flip your bed back over, so it's standing up on the newly attached wheels.
Then, get your palm sander and go over the entire surface as needed to smooth it out. We'll end up putting a pillow over this surface at the end, but having a smooth base will help keep your pillow cover from snagging and getting caught on excessively rough pallet wood.
6. Measure and Cut Outer Frame
Next we're going to trim out our pet bed by adding large trim pieces around the edge. I was able to find boards that are about 6 inches wide, which I think is ideal. However, there isn't a hard and fast rule here. Pallets have boards that vary in width, so just find boards that are as wide as possible for the trim.
Even if you want to cheat a little bit and go buy one piece of 1 x 8 pine wood for this part - nobody will judge you 🙂
However wide your trim boards are, you do want to measure them and cut them to fit the length of the sides and back of your frame. You can make these cuts with your circular saw.
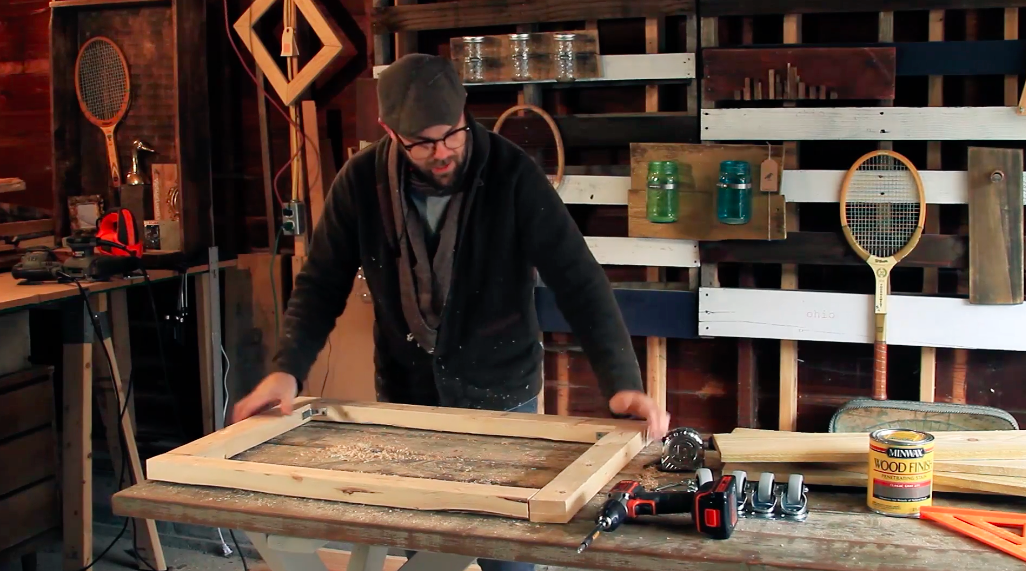
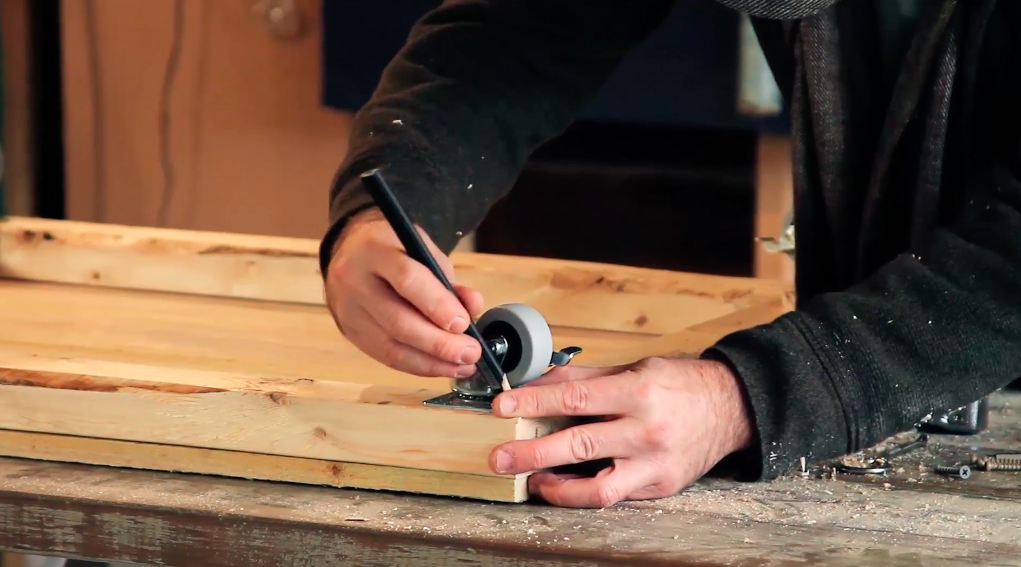
7. Attach Frame Pieces
Attaching the outer frame pieces is much easier when you use a few clamps as shown below. These function like an extra set of hands for you.
Once your board is held in place, you can easily pre-drill your holes and then use your wood screws to attach the trim piece to the frame. I put a screw about 3 inches apart all the way down the length of my trim board.
8. Repeat Steps on Each Side
Now that you've done one side trim piece, follow the exact same steps of measuring, cutting, clamping, screwing on both the back and the opposite side.
For the front of your pet bed, you'll want to do your trim a little differently in order to make a cut out "door way" so your dog can easily get in and out of the bed as shown below:
Remember that the front of your pet bed is 33 inches long.
So to accomplish the little doorway opening, I actually attached 3 separate pieces of trim on the front.
The 2 side pieces were the same height as the rest of my trim. I cut each of these to 8 inches wide and then attached them to the front side of my pet bed.
For consistency, I added a third trim piece to cover up the doorway gap in the middle. Since my other full sized trim pieces were 8 inches wide each, that means that my short trim piece for the middle needed to be 17 inches wide.
8in + 8in + 17in = 33in (the width of the front of our bed).
I also cut this 17in piece to be 3 inches high, which covered the front nicely and left a very small lip where my trim piece was slightly higher than the pallet board floor of my bed. Adding this little piece really makes the bed feel fully complete and framed in.
9. Sand Your Frame
Like you did for your bed floor, take a palm sander and touch up the edges and the sides of your frame to smooth it out.
10. Stain/Paint and Add Pillow
Now you're done with the hard part. The last step is to decide if you'd rather paint or stain this pet bed and what color is going to look best in your home. I like a darker stain, so that's what I used for mine as shown below.
You'll also want to add a pillow so your pet can sleep comfortably. The pillow also gives you another opportunity to customize and match the look and feel of your home.
Here's our finished product: